By: Joanne Scott
It seems like the expression “the struggle is real” was written for horse people in general, and
for me in particular. The struggle between my Hunter Princess roots with my wanna-be
Dressage Queen present, the struggle between wanting to ride constantly but being a weather
wimp, the struggle between good and evil (I have mares!)… But mostly, the struggle between
being a total cheapskate and a total tack hoarder.
It’s true. The struggle is real.
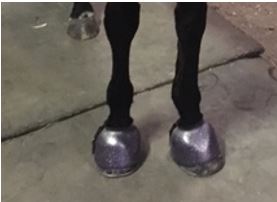
This most recently came into play when my newly-acquired PURPLE GLITTER (caps required,
because hello! PURPLE GLITTER!) Davis bell boots rubbed nasty holes on my mare. Now,
Miss Precious has been super special needs this past year and lives in bell boots religiously.
Her paranoid momma won’t let her step foot outside of the barn aisle without them.
The Davis boots were a step out of our comfort zone. The stiff rubber spells rubs to me. But
my dressage trainer and barn mate both sung their praises, and I switched over, screaming into
the Davis brand with the PURPLE GLITTER set.
Sadly, our love was not meant to last and I trudged back to our local tack shop to pick up my old
friends, the Professional’s Choice Quick Wrap bell boots. These are NOT the Ballistic version,
but instead a nice floppy neoprene-esque wrap. These are extremely customizable in size, with
an overlap, and tall enough that they nicely cover mare’s tootsies. And most importantly, they
never have rubbed.
Once again, my tack hoarder heart was shattered when they were out of all sizes except ones
that looked suitable only for my 80 lb. dog…
Long story longer, I had my old pair of these locked away in the DIY-refurbished tack trunk.
Because hoarding means never having to say goodbye! Plus, with their $45 price tag, they
aren’t anything I’d chalk up to a fun, breezy purchase. Cheapskate vs. hoarder… Order online?
Repair?
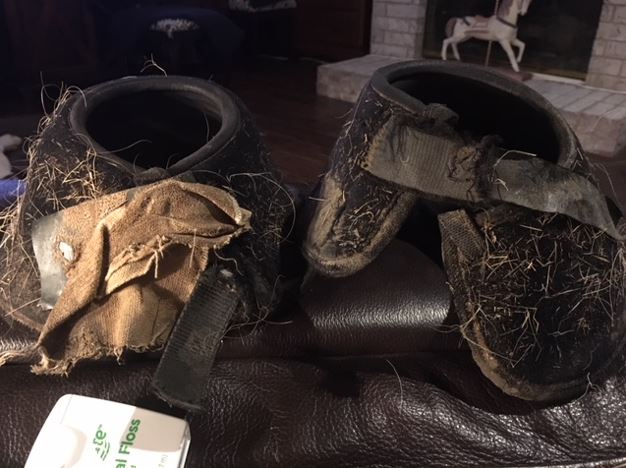
Before I go any further, I should mention that this particular pair of Pro Choice boots have been
beaten to hell and back. They are, like our favorite school horses, serviceably sound. Mare is
NOT EASY on her gear. My barn manager and I have tried any number of remedies to keep
these bad boys on, including and not limited to, supplemental Velcro recycled from saddle pads’
billet straps (hoarder alert!) and Elasticon, which failed miserably and put a sad dent in this
cheapskate’s wallet.
Bound and determine to avoid the $45 replacement purchase, I headed to Home Depot to see
what they offered by way of replacement Velcro. Oh – Professional’s Choice, if you happen to
stumble on this blog, PLEASE for the love of George Morris, make your Velcro LONGER and
STRONGER. This is my only peeve about this product.
Home Depot, aka my second home, offered a variety of solutions by way of sticky-backed
Velcro, meant for securing things around your home or office. Having sewn with sticky-backed
items before, I know this is a deal-breaker. The “sticky” gunks up your needle and makes the
project nearly impossible.
I then headed to Joann Fabric (holla, namesake!) and was pleased to find a variety of Velcro
options, including an intriguing iron-on version. Unsure of how that would work with the
neoprene-type material, I grabbed a yard of thick sew-on Velcro. (Dare I mention that my
cheapskate heart went pitter-patter with a 40% off purchase coupon?)
I settled into my recliner and set to work destroying all of the prior attempts at prolonging the life
of these beauties. Ever the lady, I discarded soiled Elasticon and torn up Velcro into a cereal
bowl I had sitting on the side table.
(Pictured below: Elasticon, billet strap Velcro, and sticky-backed Velcro sewn to sad excuse for
Pro Choice Velcro.)
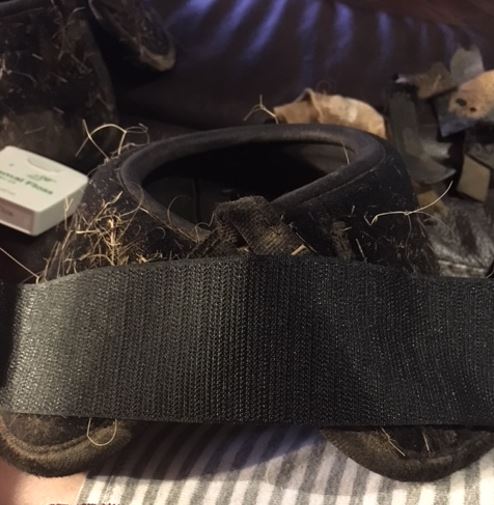
I cut the wide Velcro into four long strips approximately 6” long, and lengthwise so the stripes
were 2 ” wide. I wanted to be sure there was a long enough strip to make a good anchor on one
side while still leaving a significant piece for wrap around, and two straps per boot since that was
the existing design.
Using a needle I had in my sewing kit, I went to work with dental floss and a thimble. Say what?
Dental floss? Yes, my friends, this is the ideal item for your barn toolkit. It’s perfect to fixing
everything from a torn blanket to a treasured pair of bell boots. The thimble – well, that’s a new
addition. Usually, my barn repairs are made huddled on a trunk, using a quarter with vet wrap
wrapped around it as a thimble.
Sadly, the thimble was not the solution to all my world’s problems. I bent needle after needle
pushing through the Velcro and neoprene. My fingers grew sore from trying to pull the needle
through the other side.
The $45 purchase wasn’t seeming so bad after all. I like online shopping. I like new horse stuff!
I love surprise packages in the mail, because I always forget I’ve ordered something. But…
$45 is a good chunk of a lesson fee. Or, like, 6 Starbucks coffees!
Eureka struck – and I grabbed a pair of needle-nose pliers. I was then able to grab the small
piece of needle that would come through the “off” side and I was soon making stitches faster
than Meredith Grey can say “head lac.”

TL DR: keep a needle, a thimble, dental floss, and my new BFF needle-nosed pliers in
your repair kit at the barn!
The bell boots are now sporting their way through our winter pastures, while I sit at home and
contemplate my next online purchase… What say you, loyal readers? Are you more of the
“DIY Repair” type, or the kind of person who jumps with glee at a new tack purchase?
5 comments
Joanne Scott, Genius repair on the bell boots!!!
Love when you can keep something going! You need to get a pair of needle drivers – they’re what doctors use when suturing and would be perfect for this. Should be able to pull off Amazon for relatively cheap.
Mind blown. Thanks, Holly, for the awesome idea!
I used to go “bell boot shopping” in the pasture all the time for my last horse… who wore bell boots on ALL FOUR FEET for turnout. Those suckers are EXPENSIVE!
Have you tried plain old rubber pull on bell boots? They work great on my thin-skinned thoroughbred who was formerly a master at losing shoes in the mud. On the plus side, they are very cheap. On the down side, they are a b*%$# to put on and take off. He’s gotten rubs from regular Davis velcro bell boots (I use fleece lined velcro boots in the non-mud season) but we’ve never had a problem with the pull ons. I haven’t tried the neoprene type ones.