By guest blogger Joy Musser (@joyride4)
The Inspo
My daughter and I have been sharing a hand-me-down tack trunk for the past year and let’s just say
things are getting crowded. Helmets, half chaps, & grooming totes x2 plus saddle pads, gloves, treats, water bottles… you get the picture.
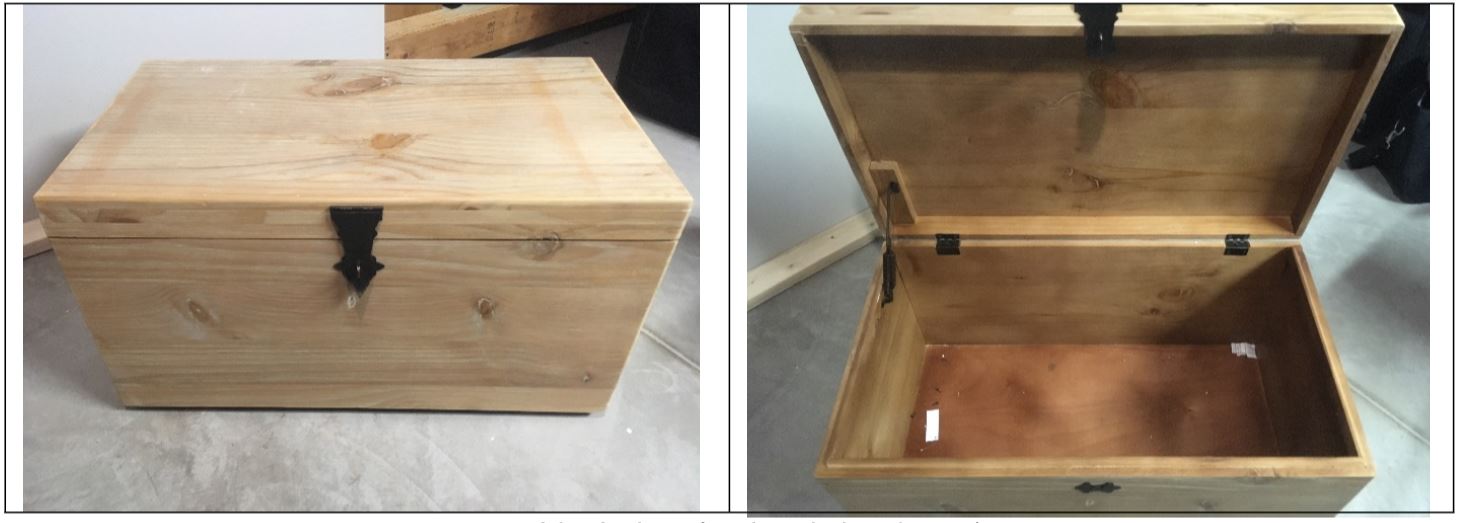
So when I saw a @Hunky_Hanoverian’s story on IG showing a wooden chest perfect for a DIY tack trunk, I
literally went that day to go check it out. Hobby Lobby had a small, unfinished trunk on clearance for
$99. I’m definitely not a wood worker, nor have I ever attempted something like this, but knowing how
much tack trunks can cost, I decided to go for it. I reasoned that if I totally botched it, I wouldn’t be out a
great sum of money (and maybe my 9 year old wouldn’t notice?!) Besides, this was more of a retro-
fitting project since I wasn’t actually building the trunk.
Deets, Specs & Plans
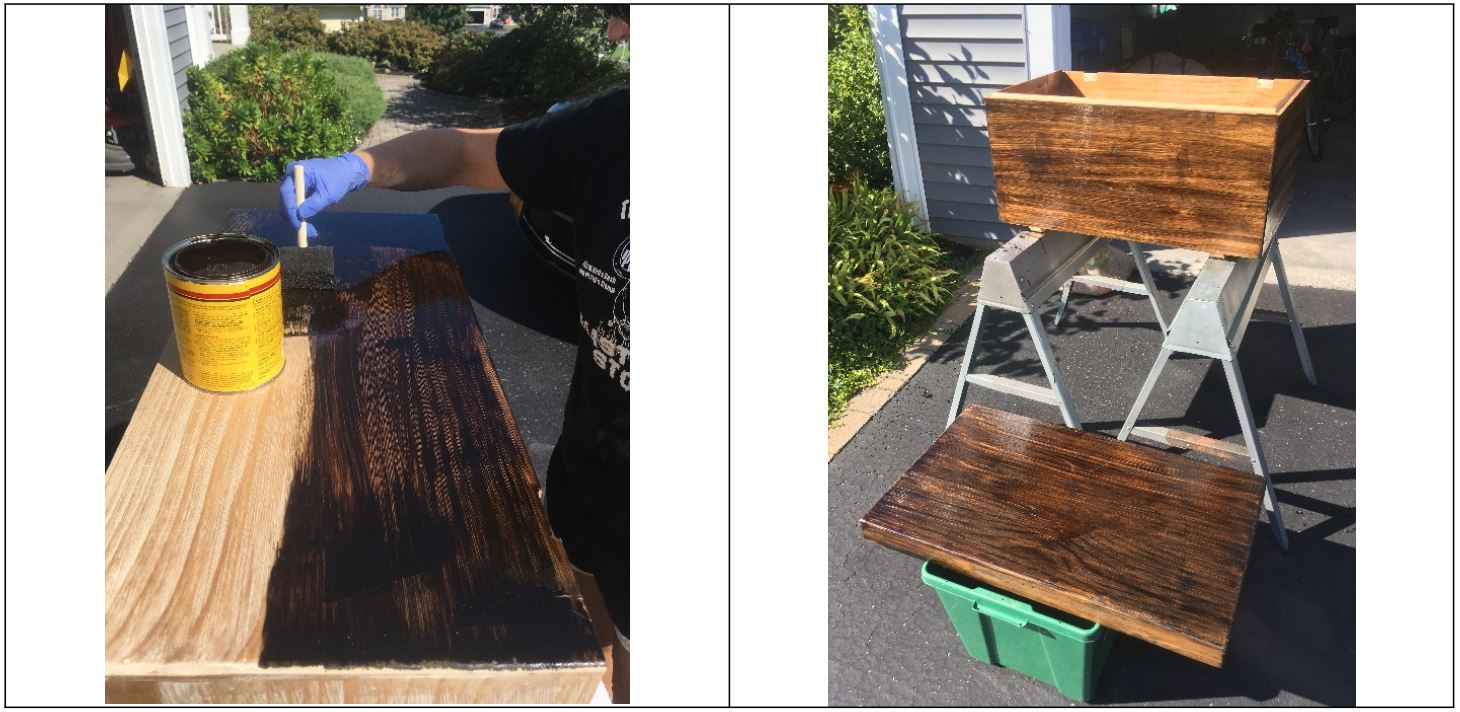
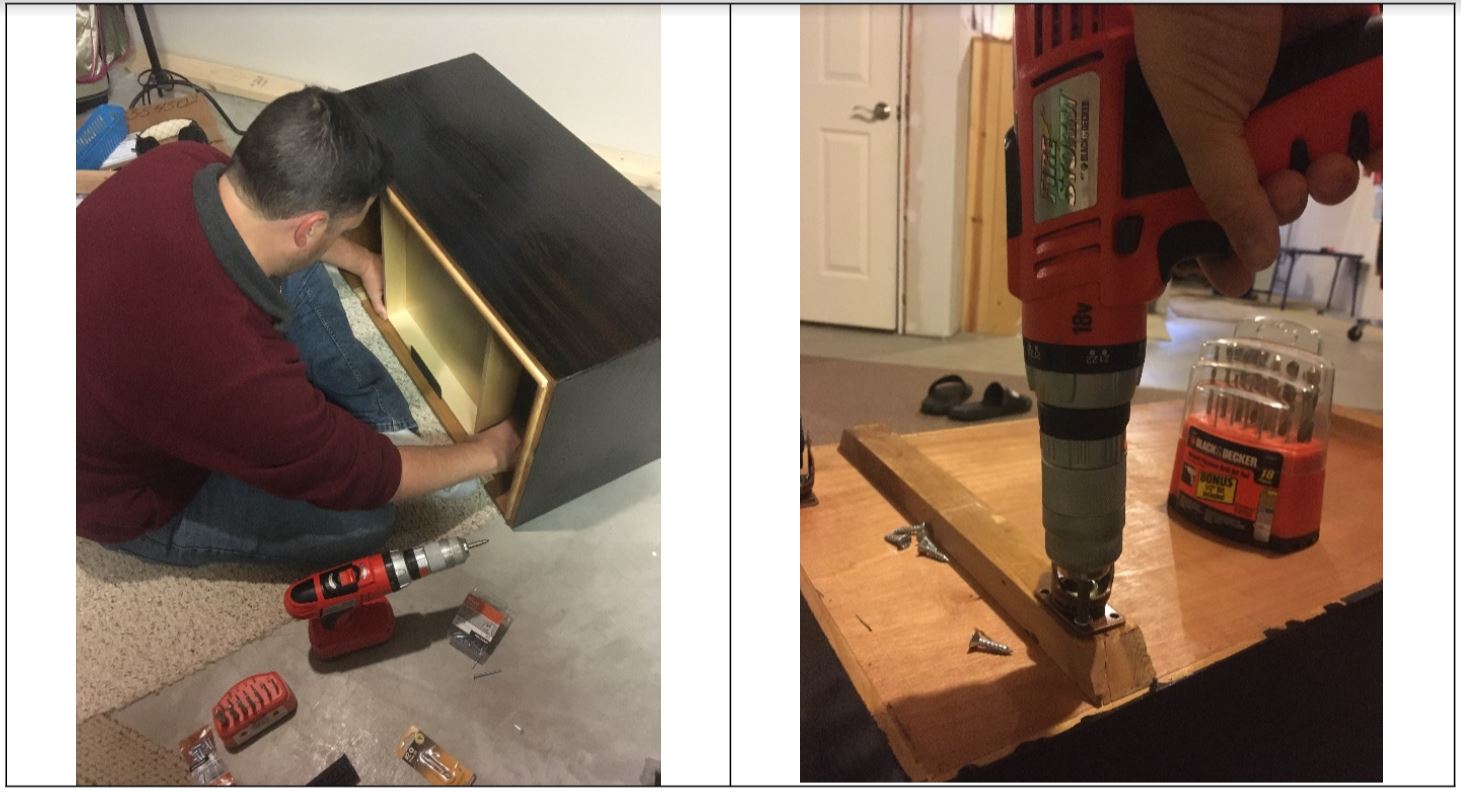
The first order of business was to pull the hardware off (I was so excited to replace this with some heavy
duty chrome pieces) and start sanding it. The bottom of the trunk had 2 pieces of wood runners that I
planned to mount wheels on. I was also really excited to personalize the lid, but more on that later. The
first major task was to stain it. I picked a rich looking Minwax stain called Jacobean. I ended up putting 3
coats on and loved how it turned out! I finished it off with a polyurethane protective top coat that came
in a spray-on can that we had on hand, and also added some outdoor weatherproofing coats to the
bottom of the trunk that would be sitting close to the ground and exposed to moisture.
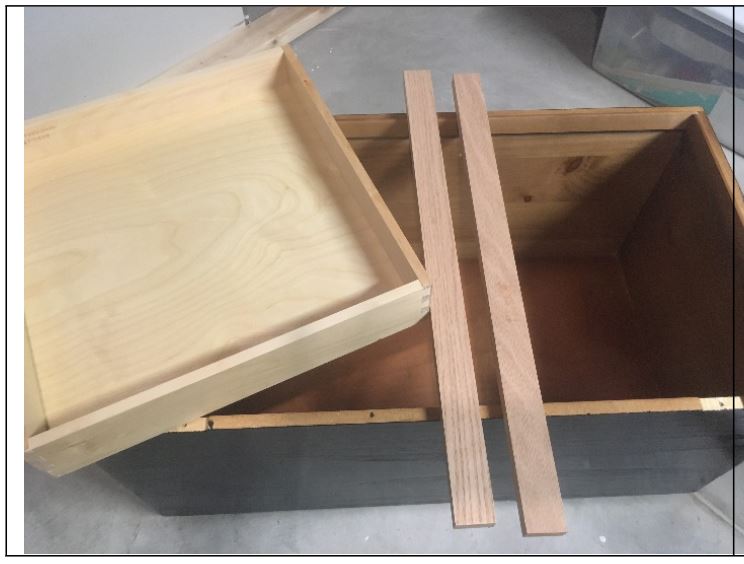
Next up was figuring out how to add a sliding tray. I spent more time searching for this online than I did
standing and staining! I stumbled into the rabbit hole of kitchen cabinets and drawers, and found my
solution! I was able to custom build a silverware tray to fit the trunk and then just needed to buy the
wood for the slider rails. It’s all coming together!
Labor of Love
My husband definitely helped with the components that required measuring, hammering, and drilling!
This project spanned several months only because I bought it in June but wanted it for a Christmas gift,
not to mention I could only work on it while she was in school. The staining and drying took a few days
with all the coats and was a bit rushed since it was still a bit tacky when I had to re-hide the whole thing
before the bus dropped her off! I really enjoyed the process though (minus the bugs that kept landing in
my wet stain) and couldn’t wait to add the finishing touches.
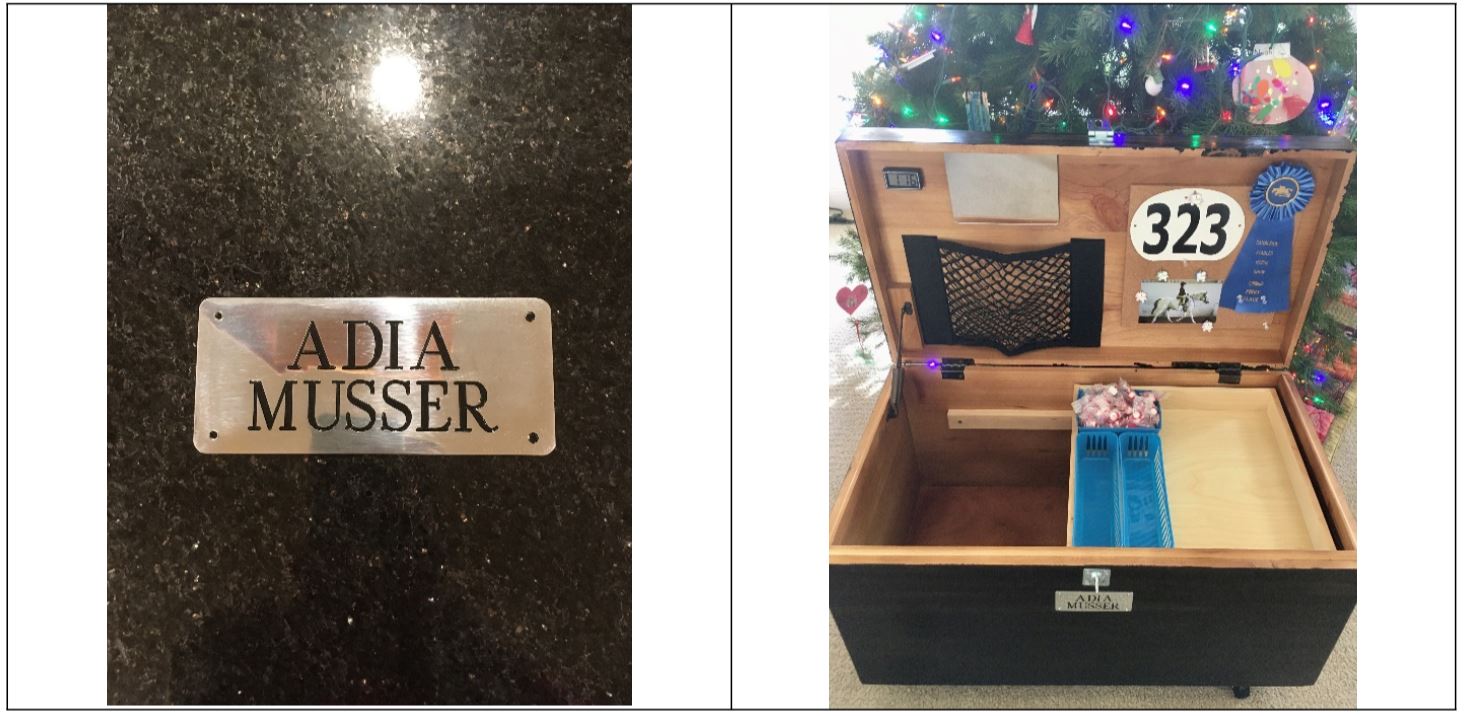
Add-Ons
The most exciting add-on for me, was putting on her name plate. I used Haltertags.com as
recommended by @Hunky_Hanoverian and was really pleased with it. We had cork boards and horsey
thumb tacks on hand from another project, and I ordered a thin locker mirror, little digital clock, and
some small cargo nets (hack also courtesy of @Hunky_Hanoverian). For the record, this is now a way
nicer trunk than I have!
What I Would Do Differently
Overall, I should note that I knew this was likely not the highest quality piece of wood. I know nothing
about wood, but I did realize that the 1” thick walls and wood type probably pale in comparison to the
heavy duty custom trunks I see at the barn. But for the price, size, and function of what we needed, I
was willing to give it a go. I also wanted to put bigger wheels on it, for both height and durability, but
was limited by the width of the wood runners on the bottom. I didn’t want to drill into the base of the
trunk of course, and we decided not to mess with trying to add extra wood to the bottom to
accommodate the base plate found on bigger wheel mounts. The silverware tray has a small lip on the
bottom, so if it slides beyond the end of the rails, it does catch a bit on the way back, but otherwise
slides just fine. I also would have watched some tutorials on wood staining BEFORE starting, as there
was definitely a learning curve to this! I had such a great time working on this, and am really pleased
with how it turned out. I’m considering doing one for myself now!

Specs: 31.5” width / 18” depth / 16.5” height / 19.5” total height with wheels
Speaking of price, here’s a rough breakdown:
- Trunk $99 (Hobby Lobby)
- Tray $40 (+ shipping, Quickdrawers.com)
- Hardware (latch, wheels, handles) $25 (Lowes)
- Wood for slider rails, stain $10 (Lowes)
- Nameplate $17 (Haltertags.com)
- Accessories (mirror, clock, Kbnian cargo net) $20 (Amazon)
Total $212
Adia’s reaction PRICELESS